Making doors with rose headed cut nails
Clenching (or Clinching) Cut Nails
Prior to the introduction of paneled doors in the 18th century all wooden doors were made by joining timber planks together. Even thereafter, most internal doors and those in poorer cottages remained plank doors even into the 20th century.
So, you’ve decided to make your own plank door and want to do it properly and traditionally. You’ve already decided what form the door will take – whether it will have 2, 3, 4 or 5 planks for instance. If you plan to have even or random width planks, maybe the planks will be tapered or parallel, with beaded edges, tongued and grooved, or rebated and whether you plan a double planked door, simply battened or ledged and braced. In all cases a historically correct and attractive door will use nails to assemble it.
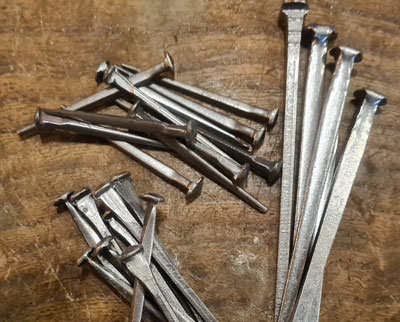
First, choose your nail.
True handmade nails are both hard to source in a correct size and expensive. True enthusiasts making early doors may choose to accept these limitations but rose headed cut nails (made by an old semi-automatic process) are available at a reasonable price. These nails were widely used in history and make an excellent job of fixing the door together.
The length of the nail will depend on the thickness of the planks you are using to build the door. You will nail from the front of the door, through the face planks into the rear facing boards. The length of the shank of the nail will be the sum of the thickness of both boards plus around 1/2inch (13mm) for clenching. For instance, an internal oak door will typically use 3/4inch (19mm) boards so the best nail would measure 2inch (50mm). Around 10 nails for a standard width door will be needed per horizontal back board, ledge, or brace but more can used for decorative effects.
Prepare to fit the nails.
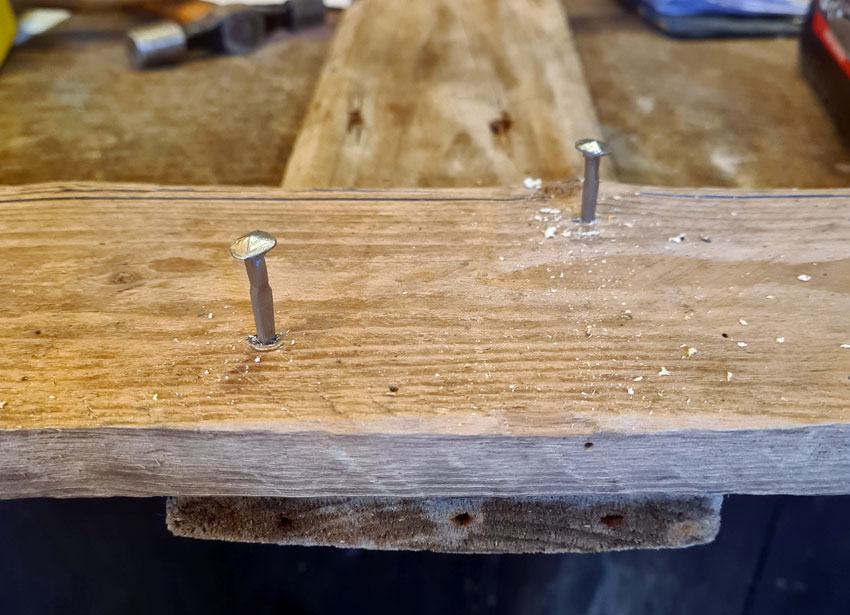
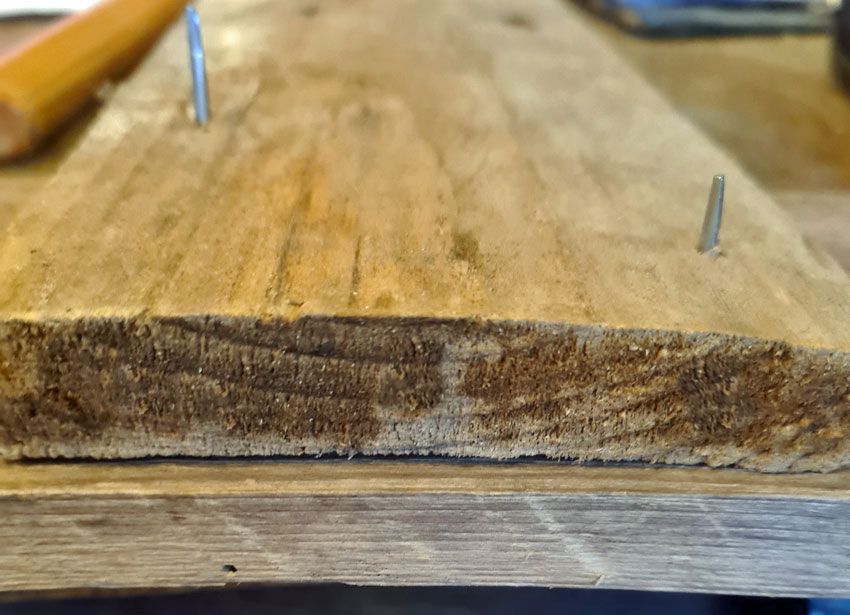
It may be a good idea to lightly (belt-and-braces) glue the boards in position prior to nailing. When you have decided where your nails should go, mark these positions. To lessen the risk of splitting your boards or the rear board breaking out as the nail exits it is wise to predrill each hole. Choose a drill size slightly smaller than the shank of the nail. If using our 2inch (50mm) rosehead cut nails a 5mm pilot hole would be sufficient. Push the nails into the drilled hole.
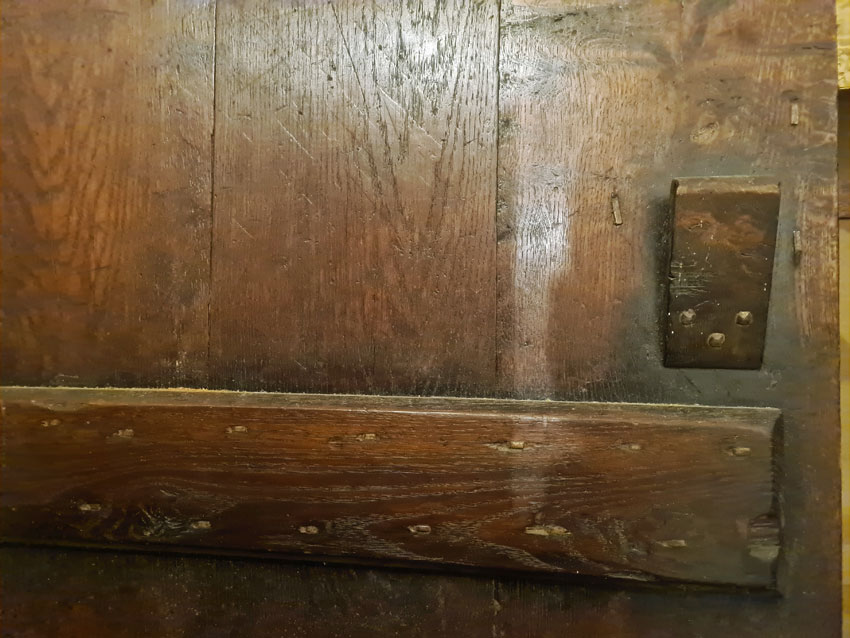
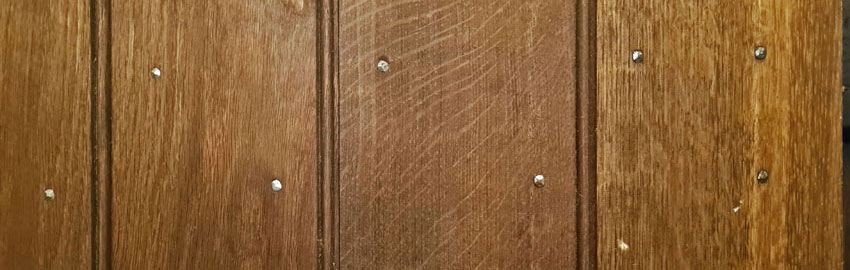
Driving the nails and clenching (clinching) the spikes.
There are 2 techniques commonly in use here. The one I’ve used most often is to knock the nail fully into the drilled pilot hole. I then fit all of the nails in this way.
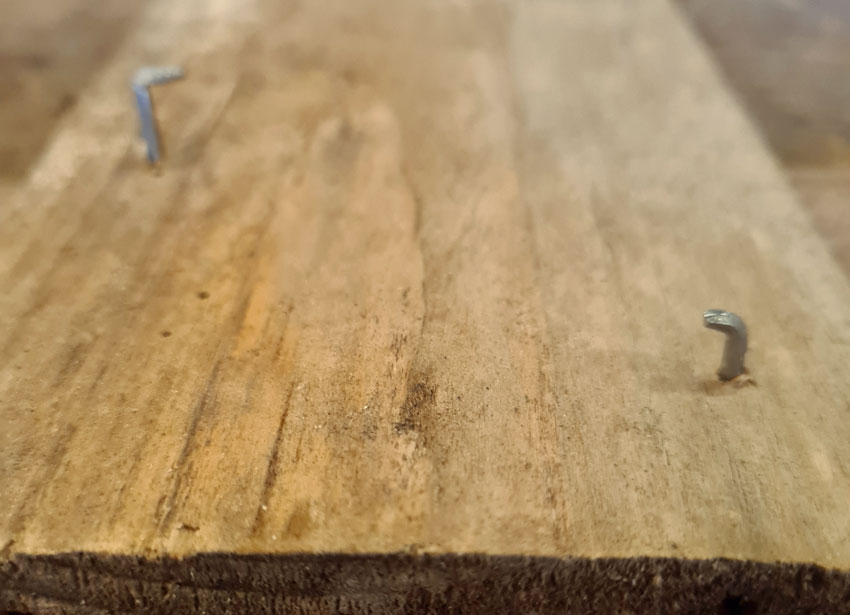
Turn the door over to reveal a forest of small spikes
and begin bending with pliers a maximum of half the length protruding by 90 degrees in a direction across the grain.
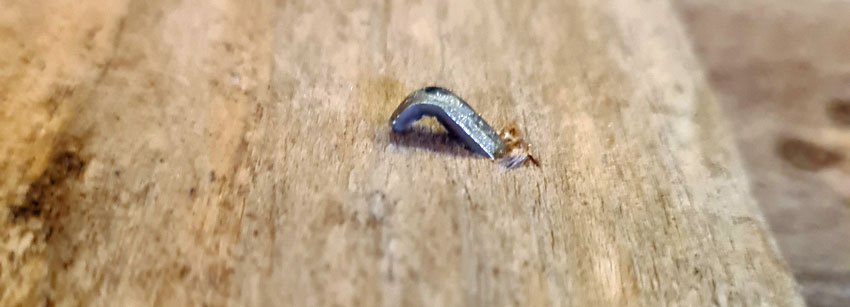
With a heavy, solid iron plate, lump hammer or a body work dolly resting on the head carefully tap the point to bury it back into the board.
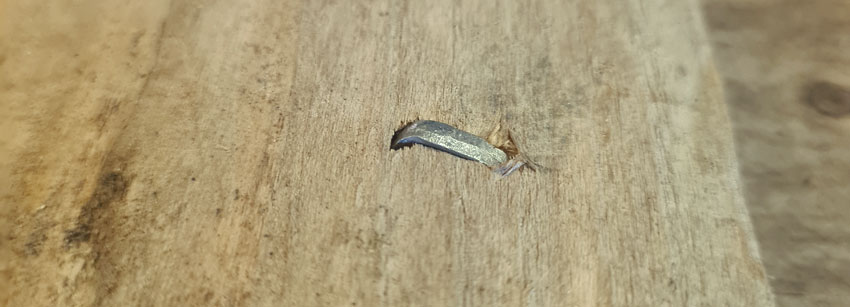
A final strike flattens the nail tip neatly into the wood.
Alternatively, partly drive the nail into the boards leaving 1/4inch (6.5mm) of the spike protruding. Flatten this short point onto the board surface then knock the nail head fully home and finish the tip burial as above.